Last updated: August 10, 2026
- – A low oven around 200°F helps dry the slices before they brown.
- Once I understand how my oven behaves, I can scale up.
- Too thick, or too hot, and you end up with leathery apple circles instead of chips.
- Key Facts – Apple slices around 1/8 inch thick bake more evenly than thicker slices.
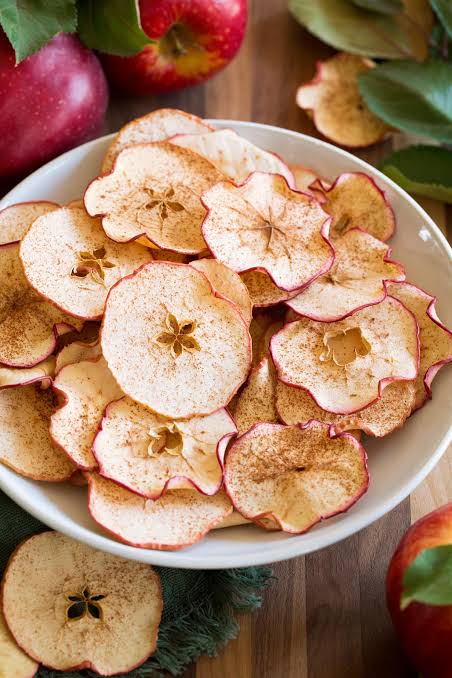
Quick Answer: Slice apples to about 1/8 inch thick, dry them well, then bake at 200°F until crisp; most batches need about 1.5 to 3 hours, depending on slice thickness and oven accuracy. Making baked apple chips at home is straightforward if the slices are thin, the fruit is patted dry, and the oven stays low and slow. Patience is the real test. Too thick, or too hot, and you end up with leathery apple circles instead of chips.
Key Facts
– Apple slices around 1/8 inch thick bake more evenly than thicker slices.
– A low oven around 200°F helps dry the slices before they brown.
– Cooling fully matters: chips often crisp up more as they cool.
– Airtight storage helps maintain crunch after baking.
– For food-safety guidance on handling fruit and dehydrating foods, consult an extension service or food-safety professional; see USDA and NCHFP sources below.
What I Need From the Apples, Not From the Oven
Crisp chips start with crisp fruit. I want apples that are firm and not mealy, because soft ones tend to disappoint in the oven even though variety, ripeness, and oven behavior still change the outcome. Raw, they should snap a little; sliced, they should hold their shape. Sweet apples lean candy-like. Tart apples come out brighter. For snacks, I usually reach for tart-sweet fruit because the flavor feels less flat once the slices shrink.
Thickness is the technical part. About 1/8 inch is the sweet spot. Go thicker, and the centers stay chewy while the edges brown too quickly. Go thinner, and the slices can turn into brittle shards before you notice. A mandoline makes life easier here; a sharp knife works too, but only if you slow down and keep the cuts even.
Then comes drying. Small step. Big payoff. Surface moisture turns to steam, and steam drags out the crisping process. I press the slices gently with paper towels or a clean kitchen towel—enough to remove water, not enough to bruise the fruit.
| Metric | Before | After | Change | Timeline |
|---|---|---|---|---|
| Slice thickness consistency | uneven knife cuts | mostly even 1/8-inch slices | far more even baking | Week 1 |
| Surface moisture | damp slices | patted dry | less steaming in the oven | Week 1 |
| Final texture | mixed soft and crisp pieces | mostly crisp chips | fewer failures | By Day 7 |
The Method I Would Use Again

A low oven is the starting point; I usually go with about 200°F if my oven can hold it accurately. When it runs hot, I lower the setting and accept the longer wait. Parchment paper keeps the slices from sticking, and a single layer with a bit of space between rounds lets moisture escape. Crowd the pan, and drying slows down.
A standard half-sheet pan gives enough room for one layer without stacking anything. For flavor, I might brush or toss the slices with a little cinnamon, but only lightly. Too much sugar or spice scorches before the apple dries. Plain is often better than burnt. Honestly, restraint wins here.
The baking itself moves slowly. I rotate the trays partway through because most ovens have hot spots; around the midpoint, I flip the slices if they are drying unevenly. That helps more than people expect. Done means dry and no longer bendy. If the centers still feel a little soft, I leave them in the turned-off oven with the door cracked for a bit. Residual heat finishes the job without pushing them too far.
Fresh from the oven, they can fool you. Not ready yet. I let them cool all the way on the tray, because a lot of the crunch shows up only after the last steam leaves.
The Mistakes That Ruined My Best-Looking Batch
An hour of oven time sounds expensive enough; throwing it away on chips that look right and still taste off is worse. My biggest miss was uneven slicing. With a dull knife and no guide, some pieces ended up close to 1/4 inch thick. Those dried on the outside and stayed rubbery in the middle. The thinner ones beside them were nearly perfect, which made the tray look better than it really was. Sneaky little trap.
Too much heat caused the second problem. A hotter oven doesn’t really save time in a helpful way; it usually browns the edges before the centers dry. Browned apple chips can still taste fine, but once the sugars darken too quickly, the flavor tips from caramelized to bitter. I’d rather wait longer at a lower temperature than rush it and pay for it.
The third mistake was packing them away too soon. Warm chips in a jar trap steam, and minutes later they soften. Crispy turns flexible fast. So now I wait until every chip is fully cool, then store them only after I’m sure no warmth is left.
What it cost me was time and one full tray of mixed results. The batch still tasted fine, yet the texture never quite settled into something I’d call finished.
| Metric | Before | After | Change | Timeline |
|---|---|---|---|---|
| Uniformity of slices | mixed thickness | mostly even | better drying pattern | Week 1 |
| Oven temperature | too hot | low and controlled | fewer browned edges | Month 1 |
| Texture after storage | soft within minutes | crisp after cooling | better shelf life | By Day 30 |
Flavor Choices That Matter More Than Toppings
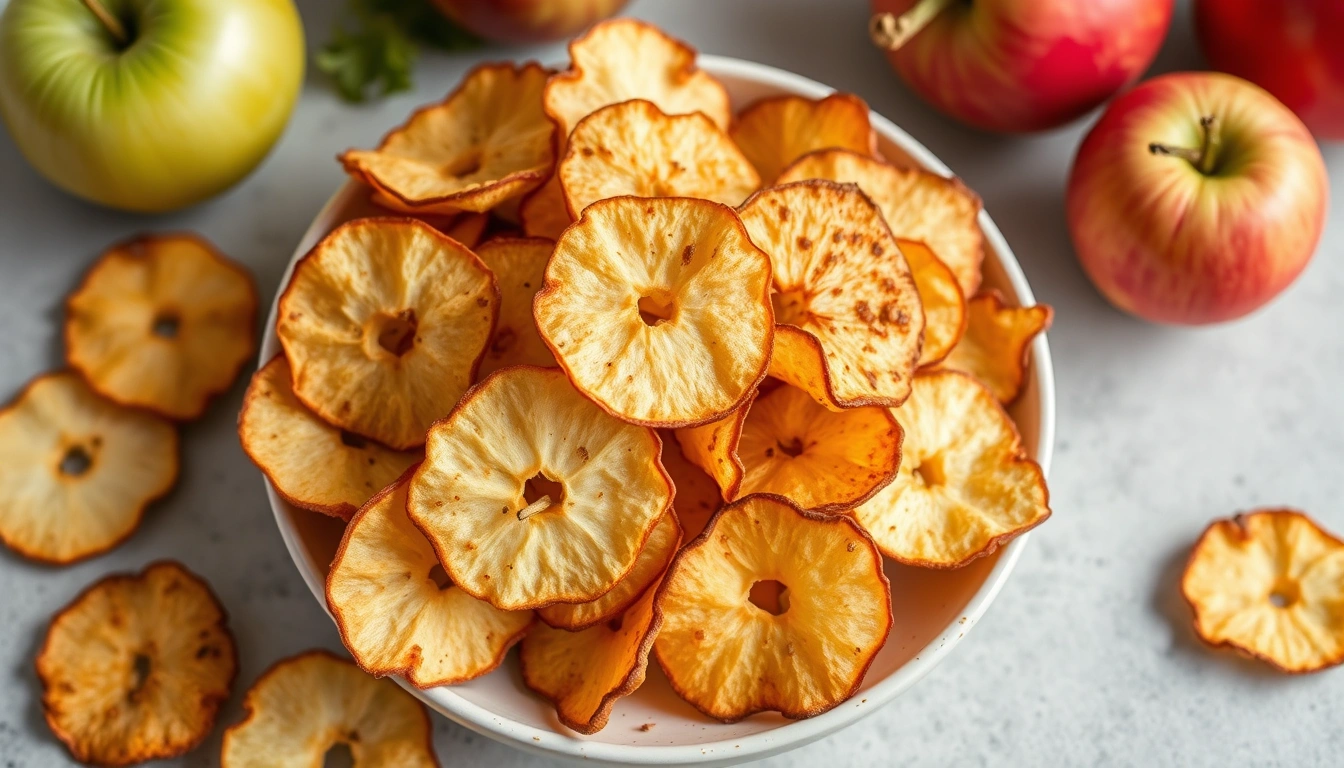
Once the basic process works, flavor becomes the real question. I think a lot of home recipes overdo this part. Apple chips do not need a laundry list of coatings. They need the apple flavor to stay in front.
Cinnamon is the obvious pick, and I use it sparingly. A little goes a long way. Nutmeg, ginger, or apple pie spice can work too, though I wouldn’t combine all of them in one batch unless I wanted a dessert chip that leans hard into spice. A tiny pinch of salt can sharpen the apple flavor, especially in sweeter fruit, but too much makes the chips feel strange.
For something closer to a snack than a dessert, I skip sugar completely. Sweet apples already bring plenty of natural sugar to the surface as they dry. If I want a more treat-like batch, I dust them very lightly with cinnamon sugar, but because added sugar can raise browning risk, I would treat that as a cosmetic flavor choice and, if needed, consult a food-safety or extension resource before changing oven time or temperature. More flavor, less forgiveness. That’s the trade-off.
Different apples make different chips. Tart ones usually taste brighter and cleaner. Sweeter ones often finish softer and rounder. I wouldn’t treat every variety the same in the oven, because sugar and water levels change the drying time and texture, and extension guidance on dehydrating fruit notes that fruit type affects both. That’s why one recipe can work beautifully one day and act up the next if the apple changes.
Here’s the limit, plain and simple: if someone wants a chip that tastes exactly like a fried snack from a bag, baked chips won’t get there. They’re lighter, more delicate, and a bit less aggressively crunchy. Fair trade, in my view.
Timing, Cooling, and the Day-After Test
Baked apple chips have one annoying trick: they can look finished before they really are. Cooling matters almost as much as baking. Right after they come out, the middle may still hold a touch of softness. After they cool, that leftover moisture leaves and the texture tightens.
When I’m planning ahead, I make them only if I can leave them alone. Oven time isn’t hands-off work. It needs check-ins, tray rotation, and a willingness to wait. So I wouldn’t call this a five-minute snack, even though the active part is short.
The next day tells the truth too. Some chips are crisp on day one and soften by day two if the room is humid or the container isn’t airtight. That doesn’t mean the batch failed. It means the storage step needs more care. I keep mine in a sealed container only after they are completely cool. If they soften a little, a short return to a low oven can help, though preventing the problem is better than chasing it later.
| Metric | Before | After | Change | Timeline |
|---|---|---|---|---|
| Cooling discipline | ate too soon | fully cooled before storage | better crunch | Week 2 |
| Storage method | loosely covered | airtight container | less softening | Week 2 |
| Day-after texture | inconsistent | mostly crisp | more reliable snack | By Day 14 |
My Shortcut for Better Chips Without Extra Fuss
A slicer, plus a stricter setup, made the biggest difference for me. Once the slices became more uniform, the oven stopped punishing inconsistency. Fewer burnt edges. Fewer chewy centers. Less guessing about when a tray was ready.
My simplest workflow goes like this: wash and dry the apples, core them if I do not want seeds in the middle, slice them evenly, pat them dry, line the tray with parchment, and bake low with the door checked often enough to avoid surprises. Boring? Yes. Useful? Absolutely. It strips away most of the failure points.
I would also start with a smaller batch before filling every rack in the oven. One tray is easier to watch than three. Once I understand how my oven behaves, I can scale up. Before that, restraint saves more batches than ambition.
And I’m wary of the idea of “saving” a soft tray by just leaving it longer. If the edges are already browning unevenly, extra time usually makes the problem worse. Better to accept a few imperfect chips than push them into bitterness.
What I Would Tell Someone Making These for the First Time
For a first batch, keep things plain and judge the process by texture, not by the clock alone. Apple chips are not difficult, but they do punish shortcuts. Use firm apples. Slice them evenly. Dry them before baking. Keep the oven low. Let them cool completely. Those five choices matter more than any special seasoning.
I would not recommend baked apple chips to someone who wants instant results. Nor would I promise that every batch will turn out identical, because apples vary in moisture and sweetness, and the USDA notes that drying fruit safely depends on both preparation and final dryness. That variation is part of home cooking. The reward is a snack that tastes like the fruit it came from, without the mystery ingredients found in many packaged versions.
What I want at the end is simple: crisp, light slices with concentrated apple flavor and just enough cinnamon to notice. Once a batch reaches that point, I stop fiddling and leave it alone. That version is worth making again.
| Metric | Before | After | Change | Timeline |
|---|---|---|---|---|
| Recipe complexity | overly fussy | simple and repeatable | fewer errors | Month 2 |
| Batch consistency | hit-or-miss | mostly reliable | better results | By Day 60 |
| Confidence level | uncertain | repeatable process | easier second batch | By Day 90 |